- Target Audience
- Integrator
Setup a test environment
This is not intended to be a production deployment. To run these applications in a deployed environment, see their respective deployment documentation
The purpose of this guide is to help you set up a local test environment for Five Safes TES as a single installation. It also guides you through submitting your first “Hello World” submission to verify that the environment has been configured correctly and is working as expected.
Prerequisites
-
Docker installed and running on your machine. Instructions can be found here .
-
The Docker Compose files of Five Safes TES need to be downloaded or cloned from the GitHub repository . If you have Git installed, you can do clone the repository by running the following command:
git clone https://github.com/SwanseaUniversityMedical/5S-TES-deployment.git -
Basic understanding of the architecture and workflow of Five Safes TES. See Overview for more details.
Sending Hello World submission
In a production environment, submitting can completing a task involves multiple roles across applications. In the other words, Researchers, TRE Administrators, Submission Layer Administrators, and Egress Layer Administrators each have specific responsibilities throughout the submission lifecycle. For example, TRE Administrators enable syncing/scanning and approve the project access to the TRE in step 3 and 4, Researchers complete steps 5 and 7 in the Submission Layer, and Egress Administrators review the submission results in step 6.
In this guide, these roles are combined into a single user (you) who will perform all of these actions across the different applications.
Seed demo data
-
Within the 5S-TES-deployment root directory, change to the
DemoStackdirectory:cd DemoStack -
Start the stack by running the following command:
docker compose up -d
By default, the stack will start with SeedDemoData = true, which will seed the demo data and instances.
Since “SeedDemoData” is true by default, a project named Testing and a TRE named DEMO are automatically seeded in the Submission layer. If the Docker Compose stack is running successfully, allow approximately 2 minutes for the TRE Agent to Sync the Projects across from the Submission Layer
Once the keycloak service has started, the configuration files for three realms DARE-Control, DARE-TRE and Data-Egress will be imported and applied automatically.
These realms control access to the Submission Layer, TRE Agent, and Egress Layer respectively. In the DemoStack configuration, the admin user globaladminuser will be created in each realm with the following credentials:
Username: globaladminuser
Password: password123
Start Funnel
To ease the setup process, we have included a script to start Funnel. This will automatically configure Funnel and start it.
- Open a separate terminal window and navigate to the DemoStack directory:
cd DemoStack - Run the following command to start Funnel:
./scripts/funnel.sh- If there are any issues with the automated setup script for Funnel, or if you prefer to set up Funnel manually, follow the instructions here.
- You may need to give permission to execute the
funnel.shscript by running the commandchmod +x scripts/funnel.sh.
Enable Syncing and Scanning in the TRE
- Login to the Submission Layer at localhost:7220 using the Keycloak credentials below - these are the credentials of the admin user of the TRE
DEMOin Submission Layer’s realm:
Username: accessfromtretosubmission
Password: password123- Open the TRE tab and navigate to your TRE.
- Download the Agent Onboarding Configuration JSON file by clicking the top right corner button
Download Config. - Sign in to the TRE Agent UI using the credentials below - these are the credentials of the admin user of the TRE
DEMOin TRE Agent’s realm:
Username: globaladminuser
Password: password123- Navigate to Deployment Admin tab.
- Upload the onboarding JSON downloaded from the Submission Layer. The TRE Agent will then begin synchronising automatically.
- Verify the syncing status by checking the Button in the top-right corner of the Deployment Admin page which will display Sync Active if the syncing is successful. The TRE will also appear
Onlinein the Submission Layer.
More details can be found here.
Approve the Project access to the TRE
Follow this guide to approve the project access to the TRE.
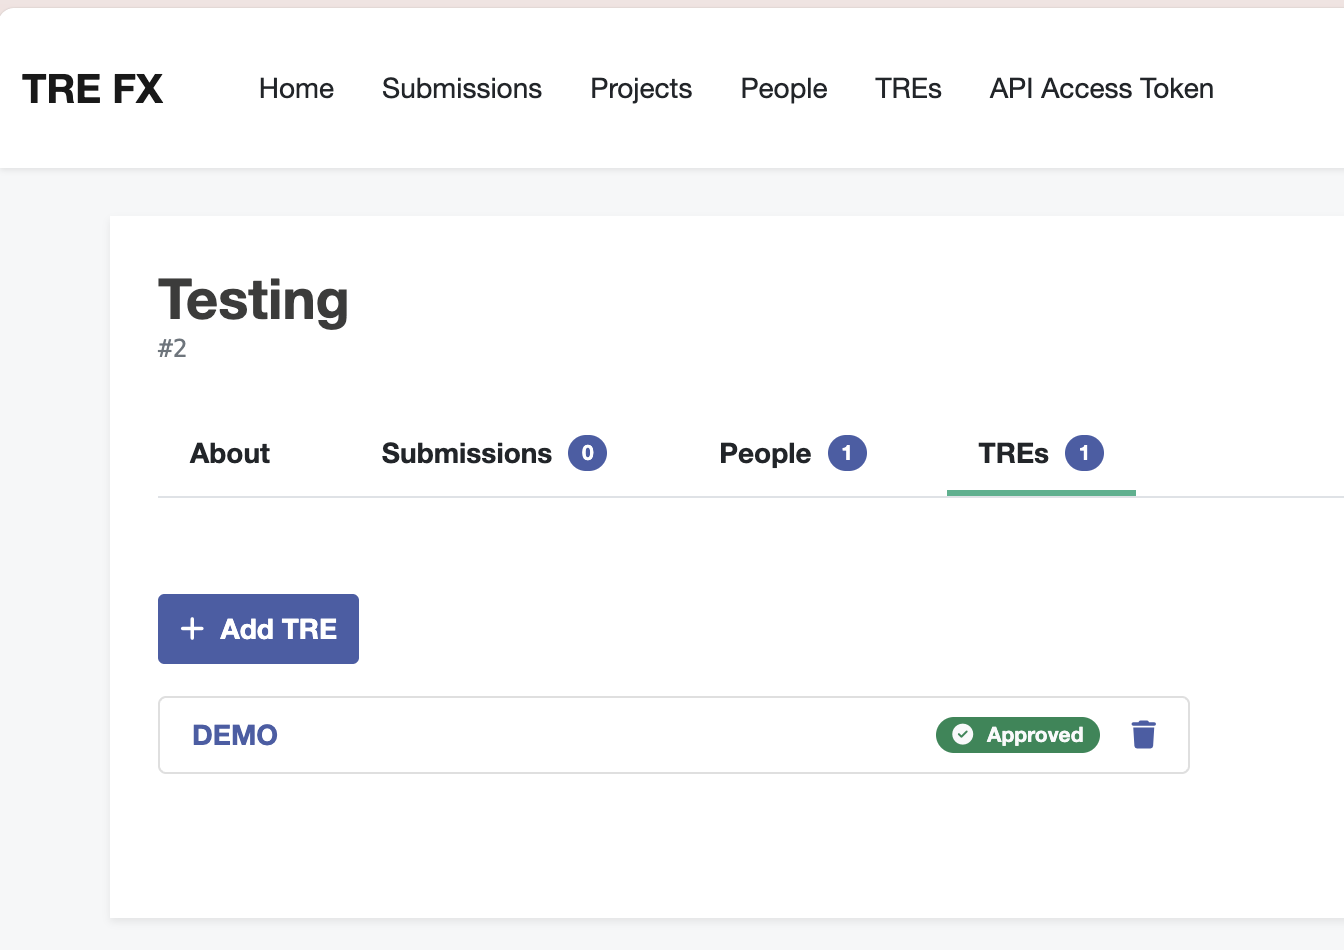
To make sure that the project has been approved and Submission Layer is in sync with TRE Agent, log into the Submission Layer at localhost:7220 , using the Keycloak credentials above. Select the project, and navigate to the TREs section. You should see Approved status for the TRE.
Send a Hello World submission
The Hello World TES task is a simple submission that is used to demo the DemoStack.
-
Login to the Submission Layer at localhost:7220 using the Keycloak credentials above (if you didn’t already)
-
Go to the
Projectspage. -
From the list of projects select the
Testingproject. -
Once in the
Testingproject go toSubmissions->Create Submission->TES Wizard. -
On the
TES Wizardpage selectSubmission Mode -> Raw JSON -
Enter the following payload, then click
Submit TES Task:
{
  "state": 0,
  "name": "Hello World",
  "inputs": [],
  "outputs": [
    {
      "name": "Stdout",
      "description": "Stdout results",
      "url": "s3://",
      "path": "/outputs",
      "type": "DIRECTORY"
    }
  ],
  "executors": [
    {
      "image": "ubuntu",
      "command": ["echo", "Hello World"],
      "workdir": "/outputs",
      "stdout": "/outputs/stdout"
    }
  ],
  "volumes": null,
  "tags": {
    "project": "Testing",
    "tres": "DEMO"
  },
  "logs": null,
  "creation_time": null
}
This submits a simple task that:
- launches an
ubuntucontainer and executesecho Hello World(“executors” section) - captures the container output in a file and saves it to the
/outputsfolder in the Output Bucket ofTestingproject located in Submission layer’s storage (“outputs” section)
More information around submitting TES Tasks using the TES Wizard can be found here.
Tracking and approving the submission results
You will be redirected to the list of Submissions, click onto the submission you just sent.
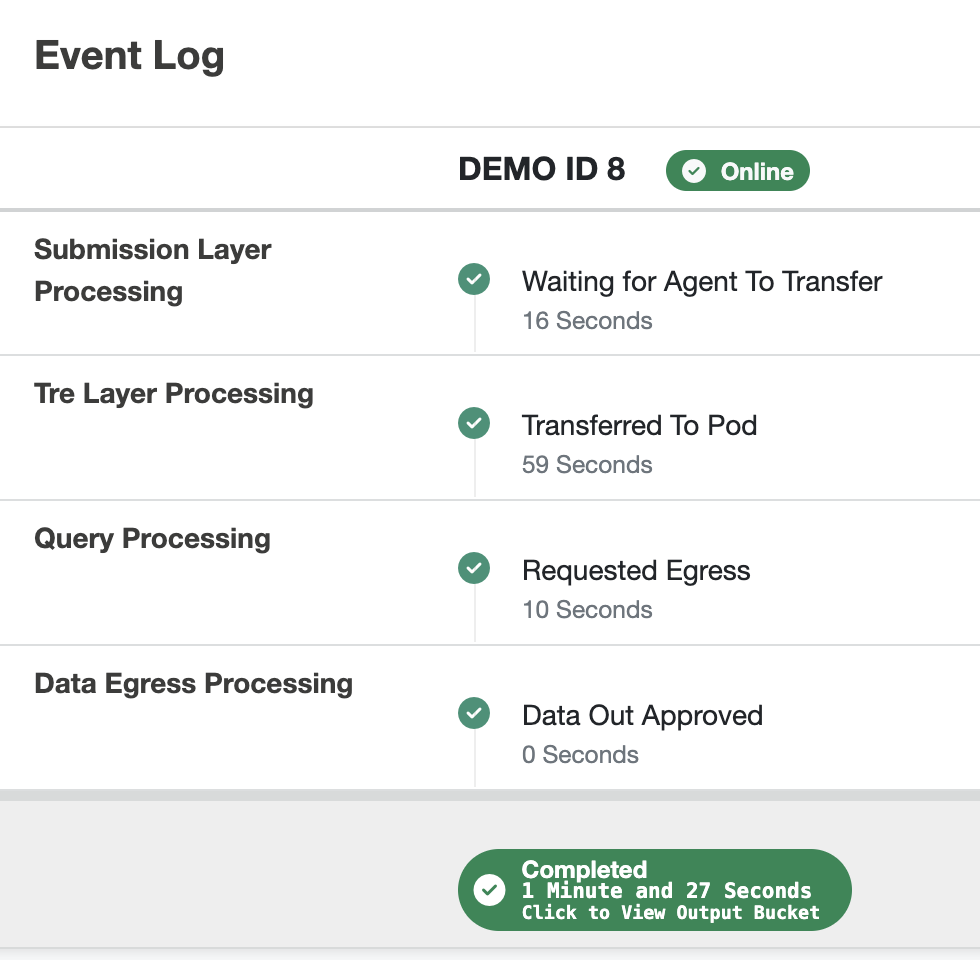
You should be able to see the status of the submission. Once it has been processed, the status will be set to: Requested Egress.
This means that the results are waiting for egress approval. Follow this guide to approve the submission results.
View the submission results
Once the Egress request has been approved, you can view the results in the Submission Layer’s output bucket.
The final successful process should be like this:
Stop the containers
To stop the containers, run the following command:
docker compose downTo start the containers again and submit submissions in the future:
- Make sure you are in the
DemoStackdirectory. - Run the following command to run the stack:
docker compose up -d - Then start Funnel by running the following command:
./scripts/funnel.sh
Next steps
Now you have setup a test environment, you can develop your integration with Five Safes TES and test it locally.