- Target Audience
- Federation Operator
Deployment Steps
Prerequisites
- Docker installed. For Linux/Ubuntu VMs, you can follow this guide to install Docker.
- Git installed on your machine, if you want to clone the repository.
Steps
Download the deployment files
There are a few ways to download the deployment files.
HTTPS Clone
Clone using the web URL.
git clone https://github.com/SwanseaUniversityMedical/5S-TES-deployment.git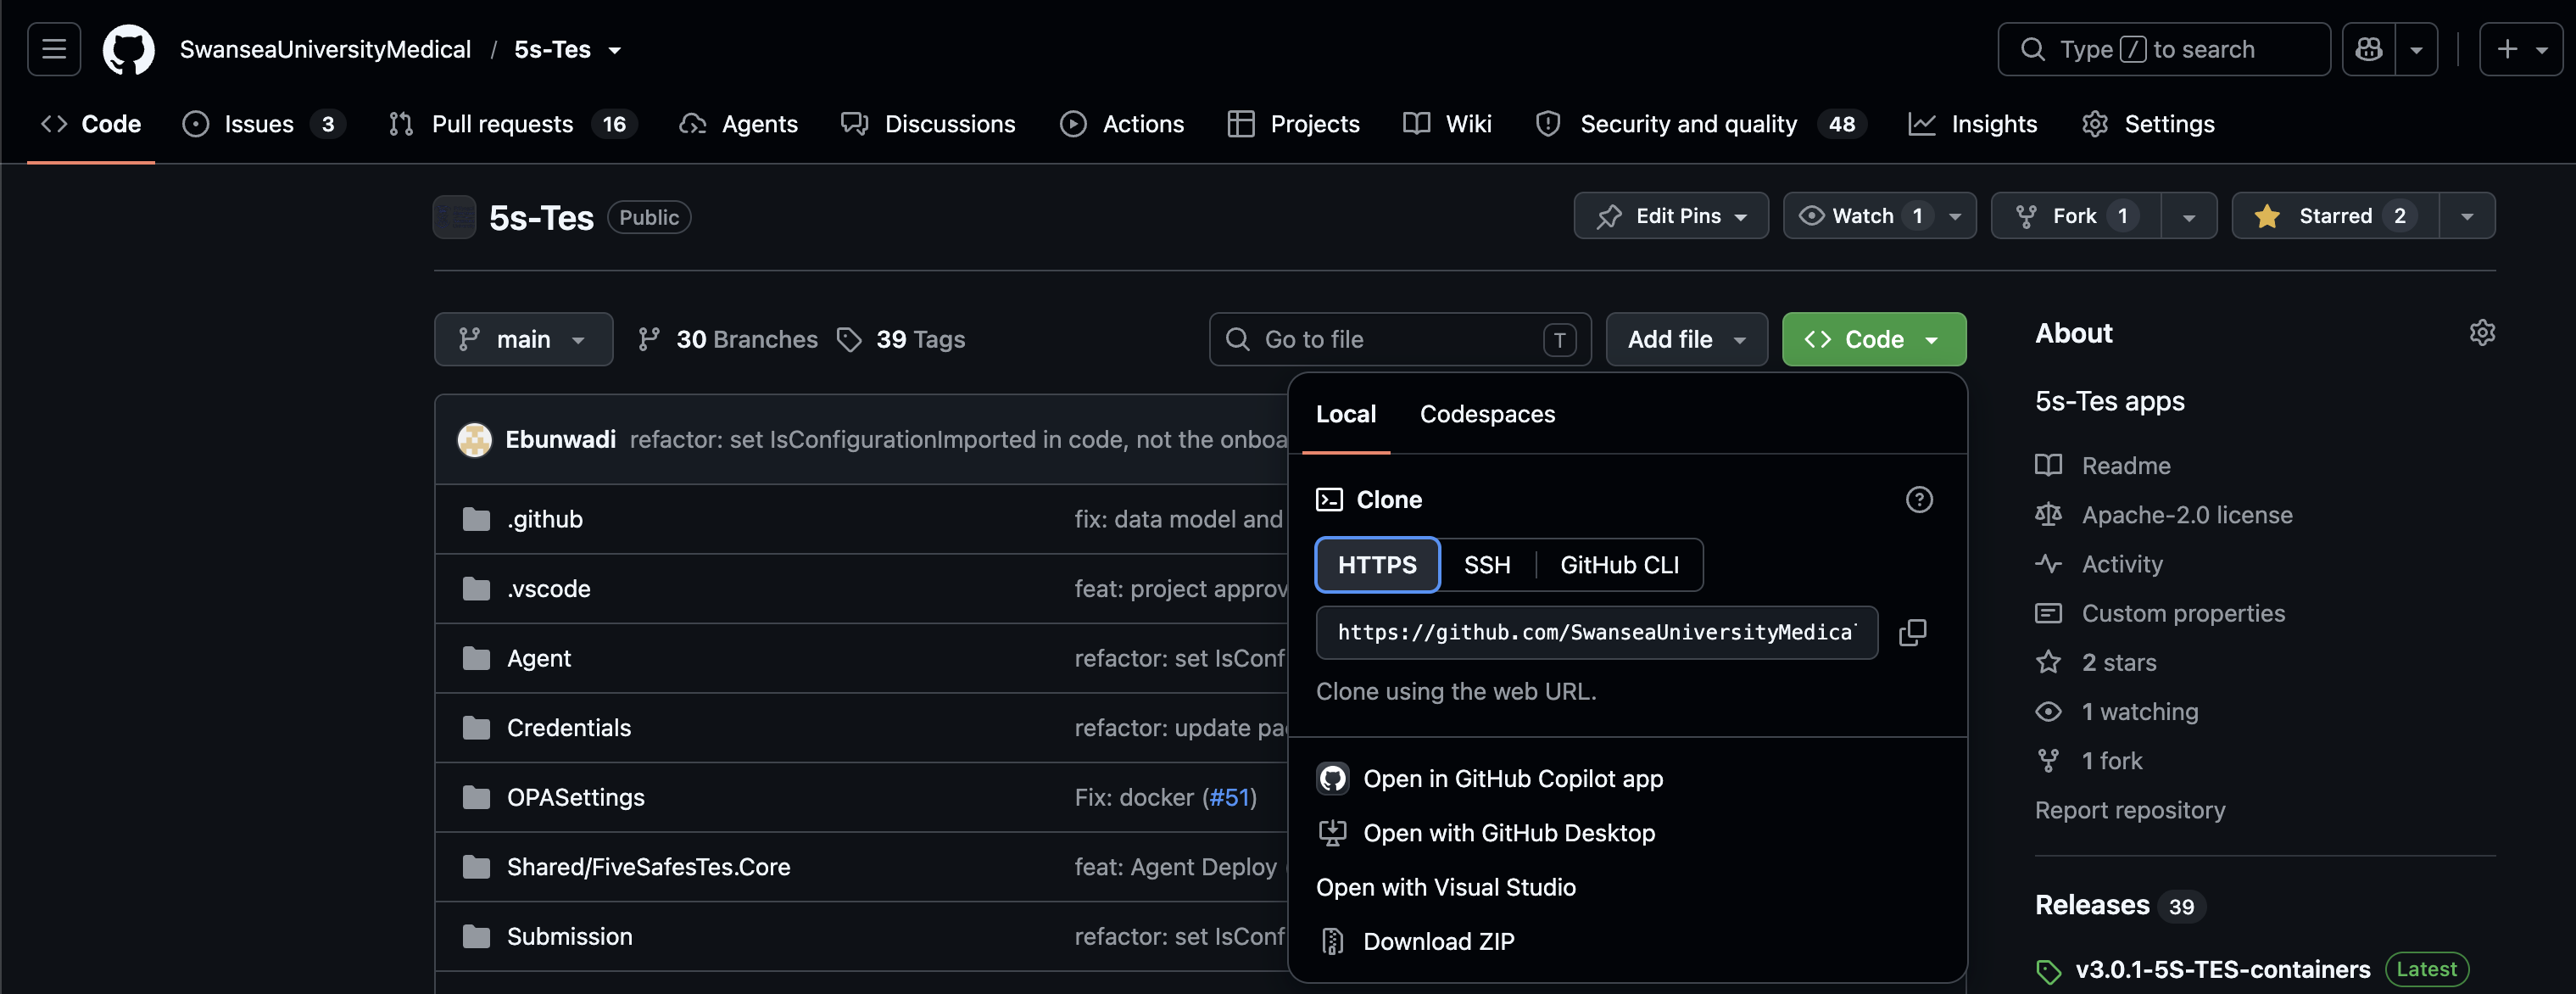
Prepare the necessary files
If you would like to modify the services while keeping the original files structure (to make Git tracking easier, for example), you can follow the steps below.
- Create a new
compose.ymlfile next toDeploymentStackandServiceStackdirectories.
- compose.yml
- Add the following content to the
compose.ymlfile, to make the connection with the original Submission Layer’s docker-compose.yml file:
include:
- DeploymentStack/Submission/docker-compose.yml- Add the override settings to the
compose.ymlfile if there are any. For example, if you want to change the port of the Submission Layer UI to8123, the content ofcompose.ymlshould be:
include:
    - DeploymentStack/Submission/docker-compose.yml

services:
  submissionUI:      # Matching the name of the service in the original Submission Layer's compose manifest file
    ports: !override # To override the port of the Submission Layer UI, to 8123 in this example
      - 8123:8080
If you would like to change the directory structure (e.g., to have your own way of managing the files), there are some notes below.
-
We recommend to move the following files and directories to a separate directory, e.g.,
/srv/tre:DeploymentStack/Submission/docker-compose.ymlDeploymentStack/Submission/config/ServiceStack/
The docker-compose.yml file in the DeploymentStack/Submission/ directory includes the services for the Submission Layer using relative paths to the compose manifests in the ServiceStack/ directory, where they are defined.
The services inside the ServiceStack/ directory are using the configuration files in the config/ directory via CONFIG_PATH environment variable.
CONFIG_PATH is the relative path from the services (yaml files) inside the ServiceStack/ directory to the configuration files (which is under config/ directory).
For example, the CONFIG_PATH for the scenario below is ../../../config because platform.yml is nested 3 levels deep from the ServiceStack/ directory compared to the config/ directory.
- docker-compose.yml
- platform.yml
- config.json
- Since the directory structure is changed, you need to update the relative paths in the
docker-compose.ymlandCONFIG_PATHin the.envfile accordingly.
Configure the stack
3.1 Create a new .env file
Create a new .env file next to the compose.yml or the docker-compose.yml file.
You can use the template from the DeploymentStack/Submission/.env.example file in the repository as a reference.
3.2 Set up Vault for secret management
You need to setup Vault and generate a root token. Run the following commands one by one in the terminal to setup Vault using Docker interaction mode:
     docker compose up -d vault   # start only the Vault server
     docker exec -it vault vault operator init -key-shares=1 -key-threshold=1  # this generates and shows on the console the unseal key and the initial root token
     docker exec -it vault vault operator unseal <UNSEAL_KEY>  # unseal the vault
     docker exec -it vault vault login <INITIAL_ROOT_TOKEN> # login to the vault
     docker exec -it vault vault secrets enable -path=secret kv-v2 # enable the secret engine
Copy the generated root token and paste it into the VaultRootToken environment variable of the .env file. Also, save the unseal key in a safe place to unseal the vault in the production mode.
After you restart the services using docker compose down and then docker compose up -d, you may see the vault service keeps waiting. This is because the vault is not unsealed.
To unseal the vault: On another terminal, run the following command: docker exec -it vault vault operator unseal <UNSEAL_KEY>.
After a few seconds, the vault service should start and other services will start as well.
3.3 Change passwords for the services
You are highly recommended to change the passwords for the services by the environment variables in the .env file.
| Environment Variable | Description |
|---|---|
PGLOGIN and PGPASSWORD | The admin credentials for the PostgreSQL database used by the TRE Agent. These are recommended to be changed from the default values. |
RabbitMQDefaultPassword | The default password for the RabbitMQ server used by the TRE Agent. Change this from the default value in production.
Default RabbitMQ username is set to |
SubmissionS3RootUser | The admin user for the Submission layer’s S3 server. |
SubmissionS3RootPass | The admin password for the Submission layer’s S3 server. |
3.4 Configure KeyCloak
Depending on where and how you want to deploy KeyCloak, the configuration is different.
Built-in KeyCloak
Built-in KeyCloak means the KeyCloak service defined in the ServiceStack/compose-manifests/shared/auth.yml directory, and this service will be deployed together with the Submission layer services if you use the default configuration.
If so, you need to configure the KeyCloak server by the following environment variables in the .env file.
| Environment Variable | Description |
|---|---|
KeycloakBootstrapAdminPassword | The bootstrap admin password for the Keycloak server used by the Submission layer. This is used to bootstrap the Keycloak server with the admin user. |
KeycloakStartupCommand | The command to start the Keycloak server. If your Keycloak doesn’t have |
KeycloakFullURL | The full hostname URL of the Keycloak server, for example, |
After that, you need to start up KeyCloak server by running the following command. Necessary realms and clients configurations will be imported automatically on startup.
docker compose up -d keycloakTo access Keycloak you need to access it via the hostname of your VM and the port. You can customise these by changing the above config and refer to the default values in the TRE Components section.
3.5 Configure OpenID secrets
Follow the guide below to re-generate the OpenID secrets for services to use.
| Environment Variable | Description |
|---|---|
SubmissionS3OpenidSecret | The OpenID secret for the S3 client of Dare-Control realm. There is a default value in the realm configuration, but you should regenerate it for production deployments. Do this by navigating to Dare-Control realm -> Clients -> Dare-Control-S3 -> Credentials. Then click Regenerate and copy the new value into this environment variable. |
SubmissionUIClientSecret | The OpenID secret for the Submission layer’s UI Keycloak client Dare-Control-UI. Find and regenerate this secret by navigating to Dare-Control realm -> Clients -> Dare-Control-UI -> Credentials. Then click Regenerate and copy the new value into this environment variable. |
SubmissionAPIKeyCloakSecret | The OpenID secret for the Submission layer’s API Keycloak client Dare-Control-API. Find and regenerate this secret by navigating to Dare-Control realm -> Clients -> Dare-Control-API -> Credentials. Then click Regenerate and copy the new value into this environment variable. |
3.6 Add a Realm admin for service accounts creation
Follow this guide to add a Realm admin for service accounts creation. Then, add the credentials to the .env file as KeycloakAdmin__Username and KeycloakAdmin__Password.
| Environment Variable | Description |
|---|---|
| Submission Layer KeyCloak realm admin credentials for service accounts creation. Follow this guide to generate. |
3.7 Configure URLs
You can set the following URLs to the hostname:port address for testing, but we recommend setting up SSL certs and subdomains for the user accessible components, and then set these to the URLs with HTTPS protocol.
A guide to set up SSL certs and subdomains is coming soon.
| Environment Variable | Description |
|---|---|
SUBMISSION_KEYCLOAK_URL | The URL of the Submission Layer’s Keycloak server, for example, https://submission-keycloak.example.com . |
SubmissionS3ConsoleUrl | Where the S3 Submission Layer UI is hosted. For example, https://s3-submission-ui.example.com . |
SubmissionKeyCloakClientUIRedirectURL | The URL for the Submission Layer’s UI’s Keycloak redirect URL. For example, https://host-of-submission.example.com/ . |
KeycloakFullURL | The full hostname URL of the Keycloak server, for example, https://my-keycloak.example.com . Note: This is only used if you are using a local/internal Keycloak service defined in the |
If you encounter the error “Invalid parameter: redirect_uri” from Keycloak when trying to login into Submission Layer UI, please make sure the redirectURL environment variables in the .env file, the URL you put on the browser’s address bar, and the Valid redirect URIs registered in Keycloak’s client settings are the same. For more details, please refer to the troubleshooting guide.
Run the Docker compose
At the directory where docker-compose.yml or compose.yml and .env files are located, run the following command to start the TRE Agent and Data Egress:
docker compose up -dIf you encounter any issues, you can check the logs of the containers by running the following command:
docker logs <container-name> -fAlternatively, you can check the logs of the stack by accessing port 5341 (Seq service) of the host machine.