Adding a New User to Key Cloak
Prerequisites and Notes
Required information:
- First Name
- Last Name
- Username
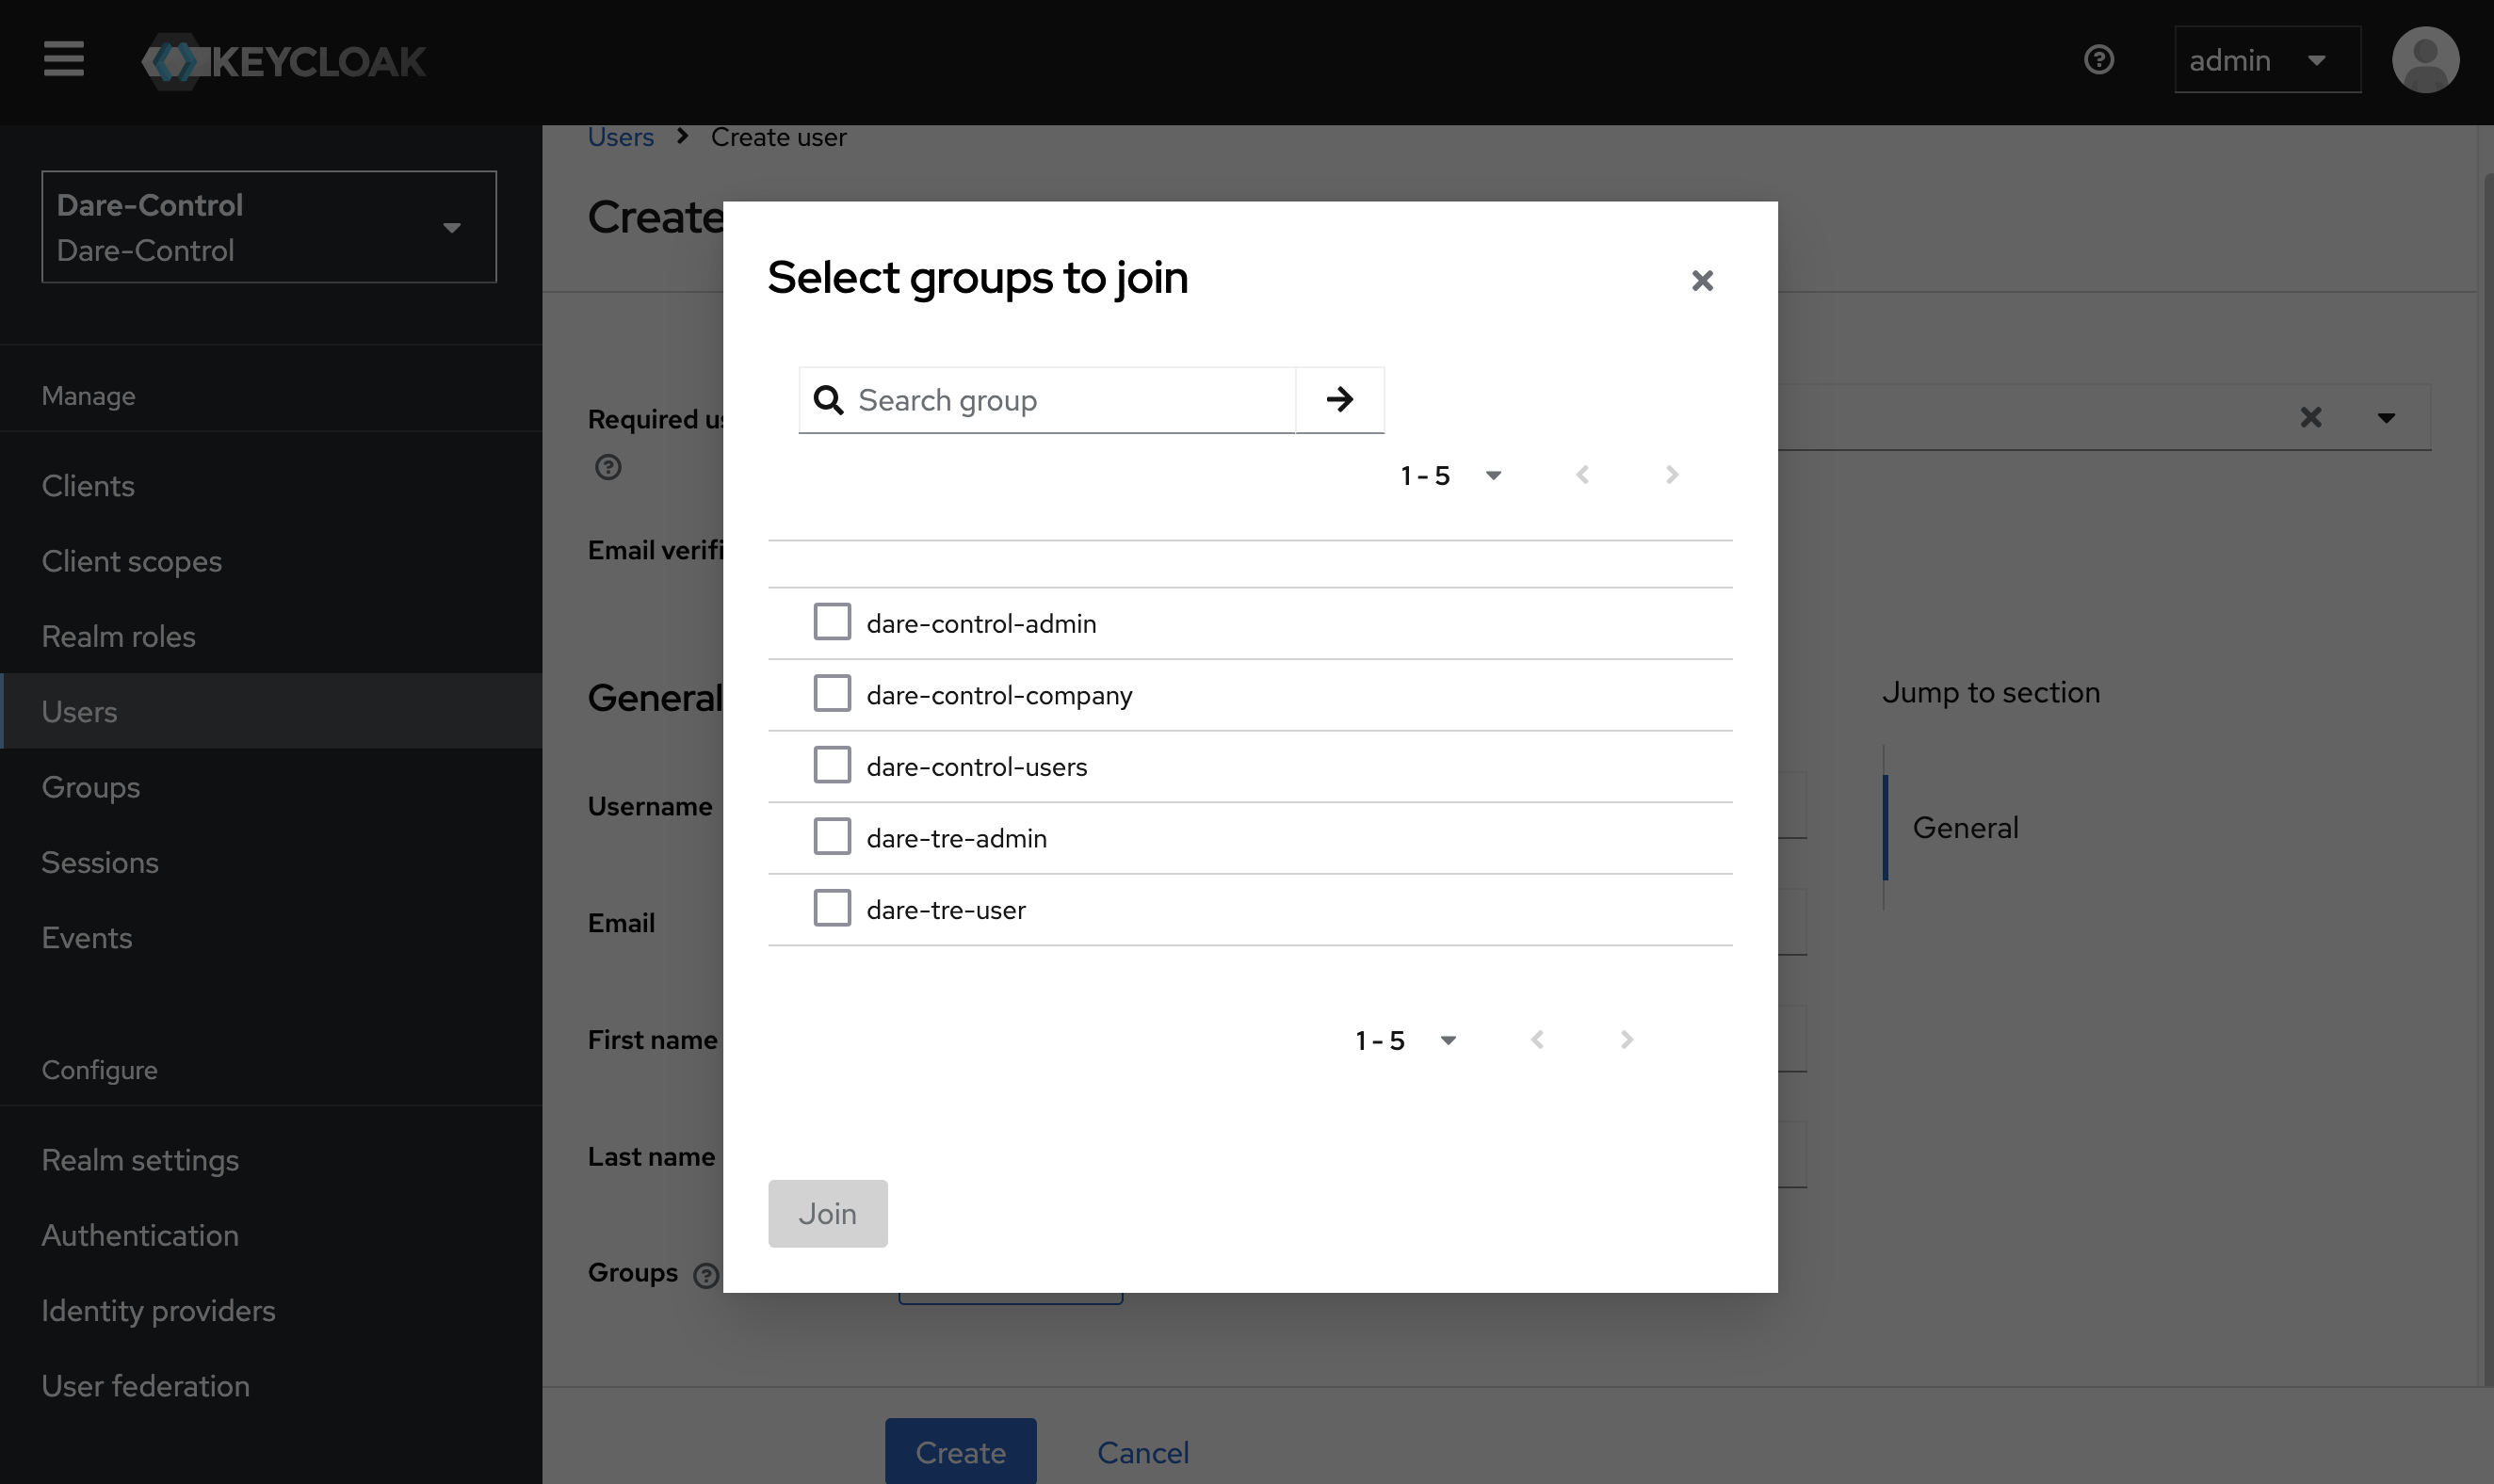
- User group(s) to add user to (basic here is dare-tre-user)
Process
Keycloak admin logs onto the Keycloak server.
Select the Dare-Control ‘User’ page.
- Open the
Dare-Controlhome page. This is done using the drop-down menu at the top of the side-bar on the left of the home page. If the left side-bar is not visible it can be accessed using the ‘three bar’ button in the top-left corner of the page. - Then open the ‘Users’ page using the ‘Users’ option in the same side-bar.
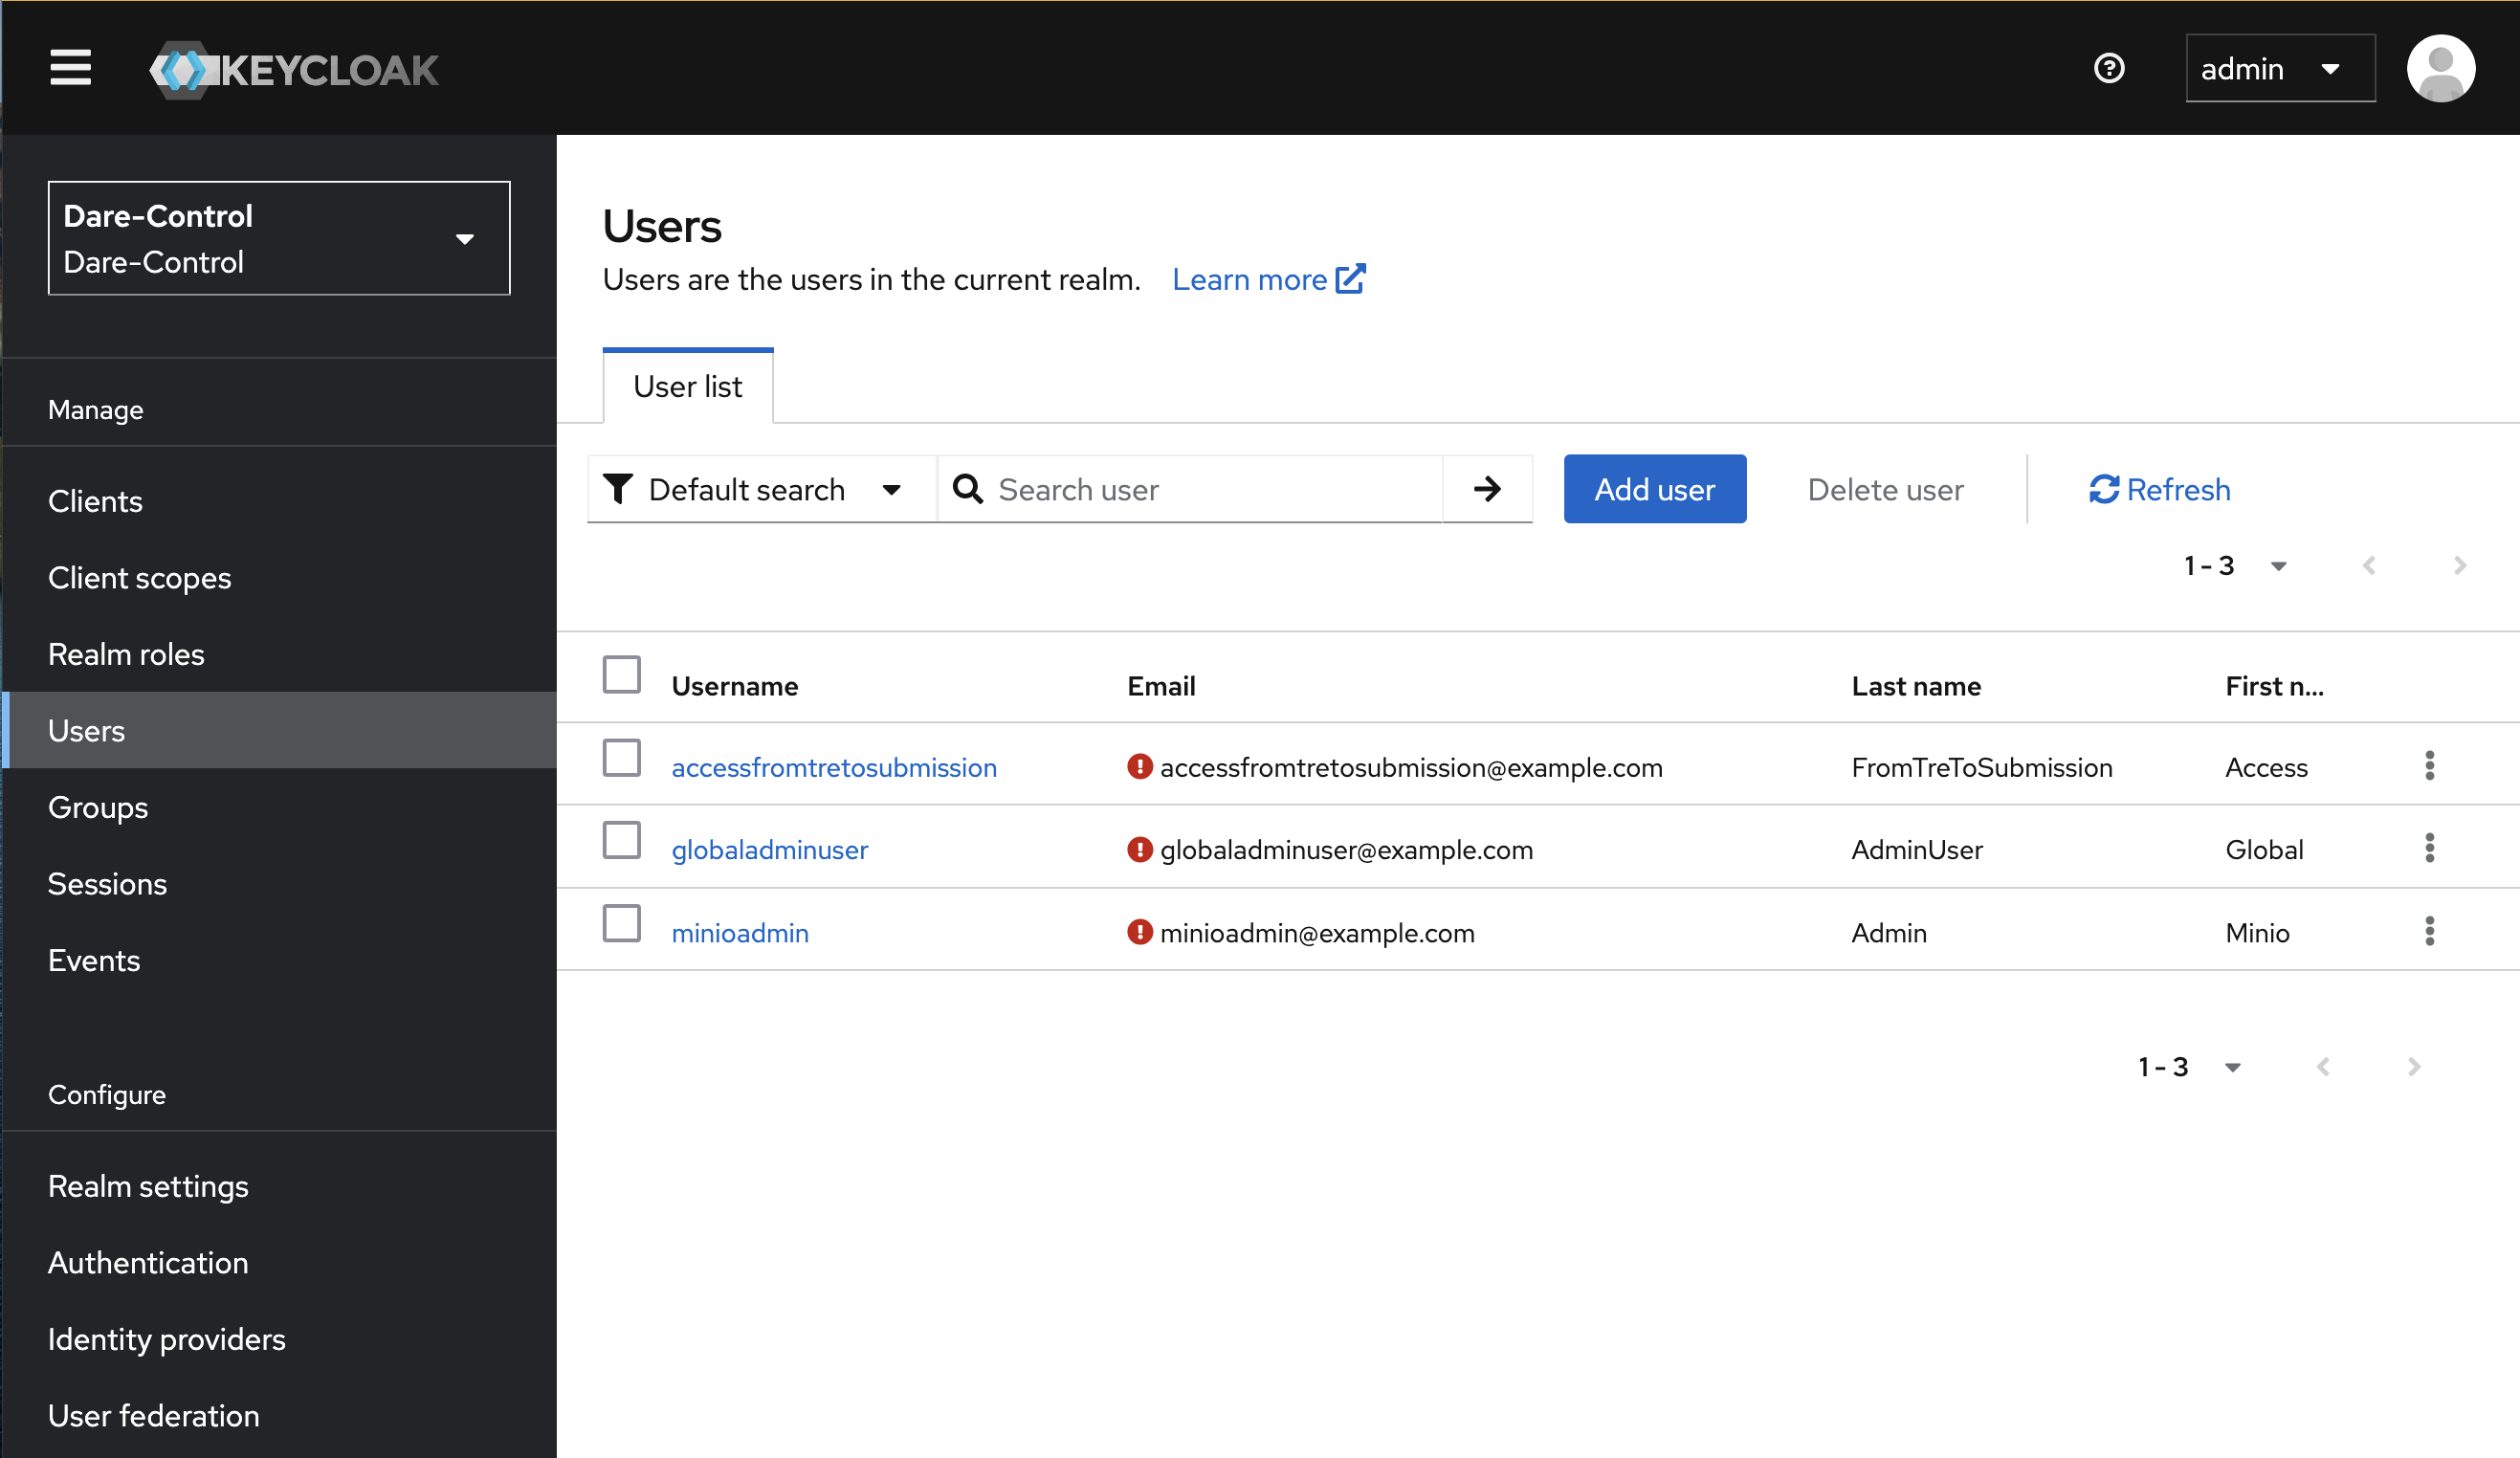
Open Create User dialog.
Click on the blue ‘Add user’ button on the ‘Users’ page, shown in the previous step, to open the ‘Create user’ dialog.
Enter User Details, and Assign to Required Groups.
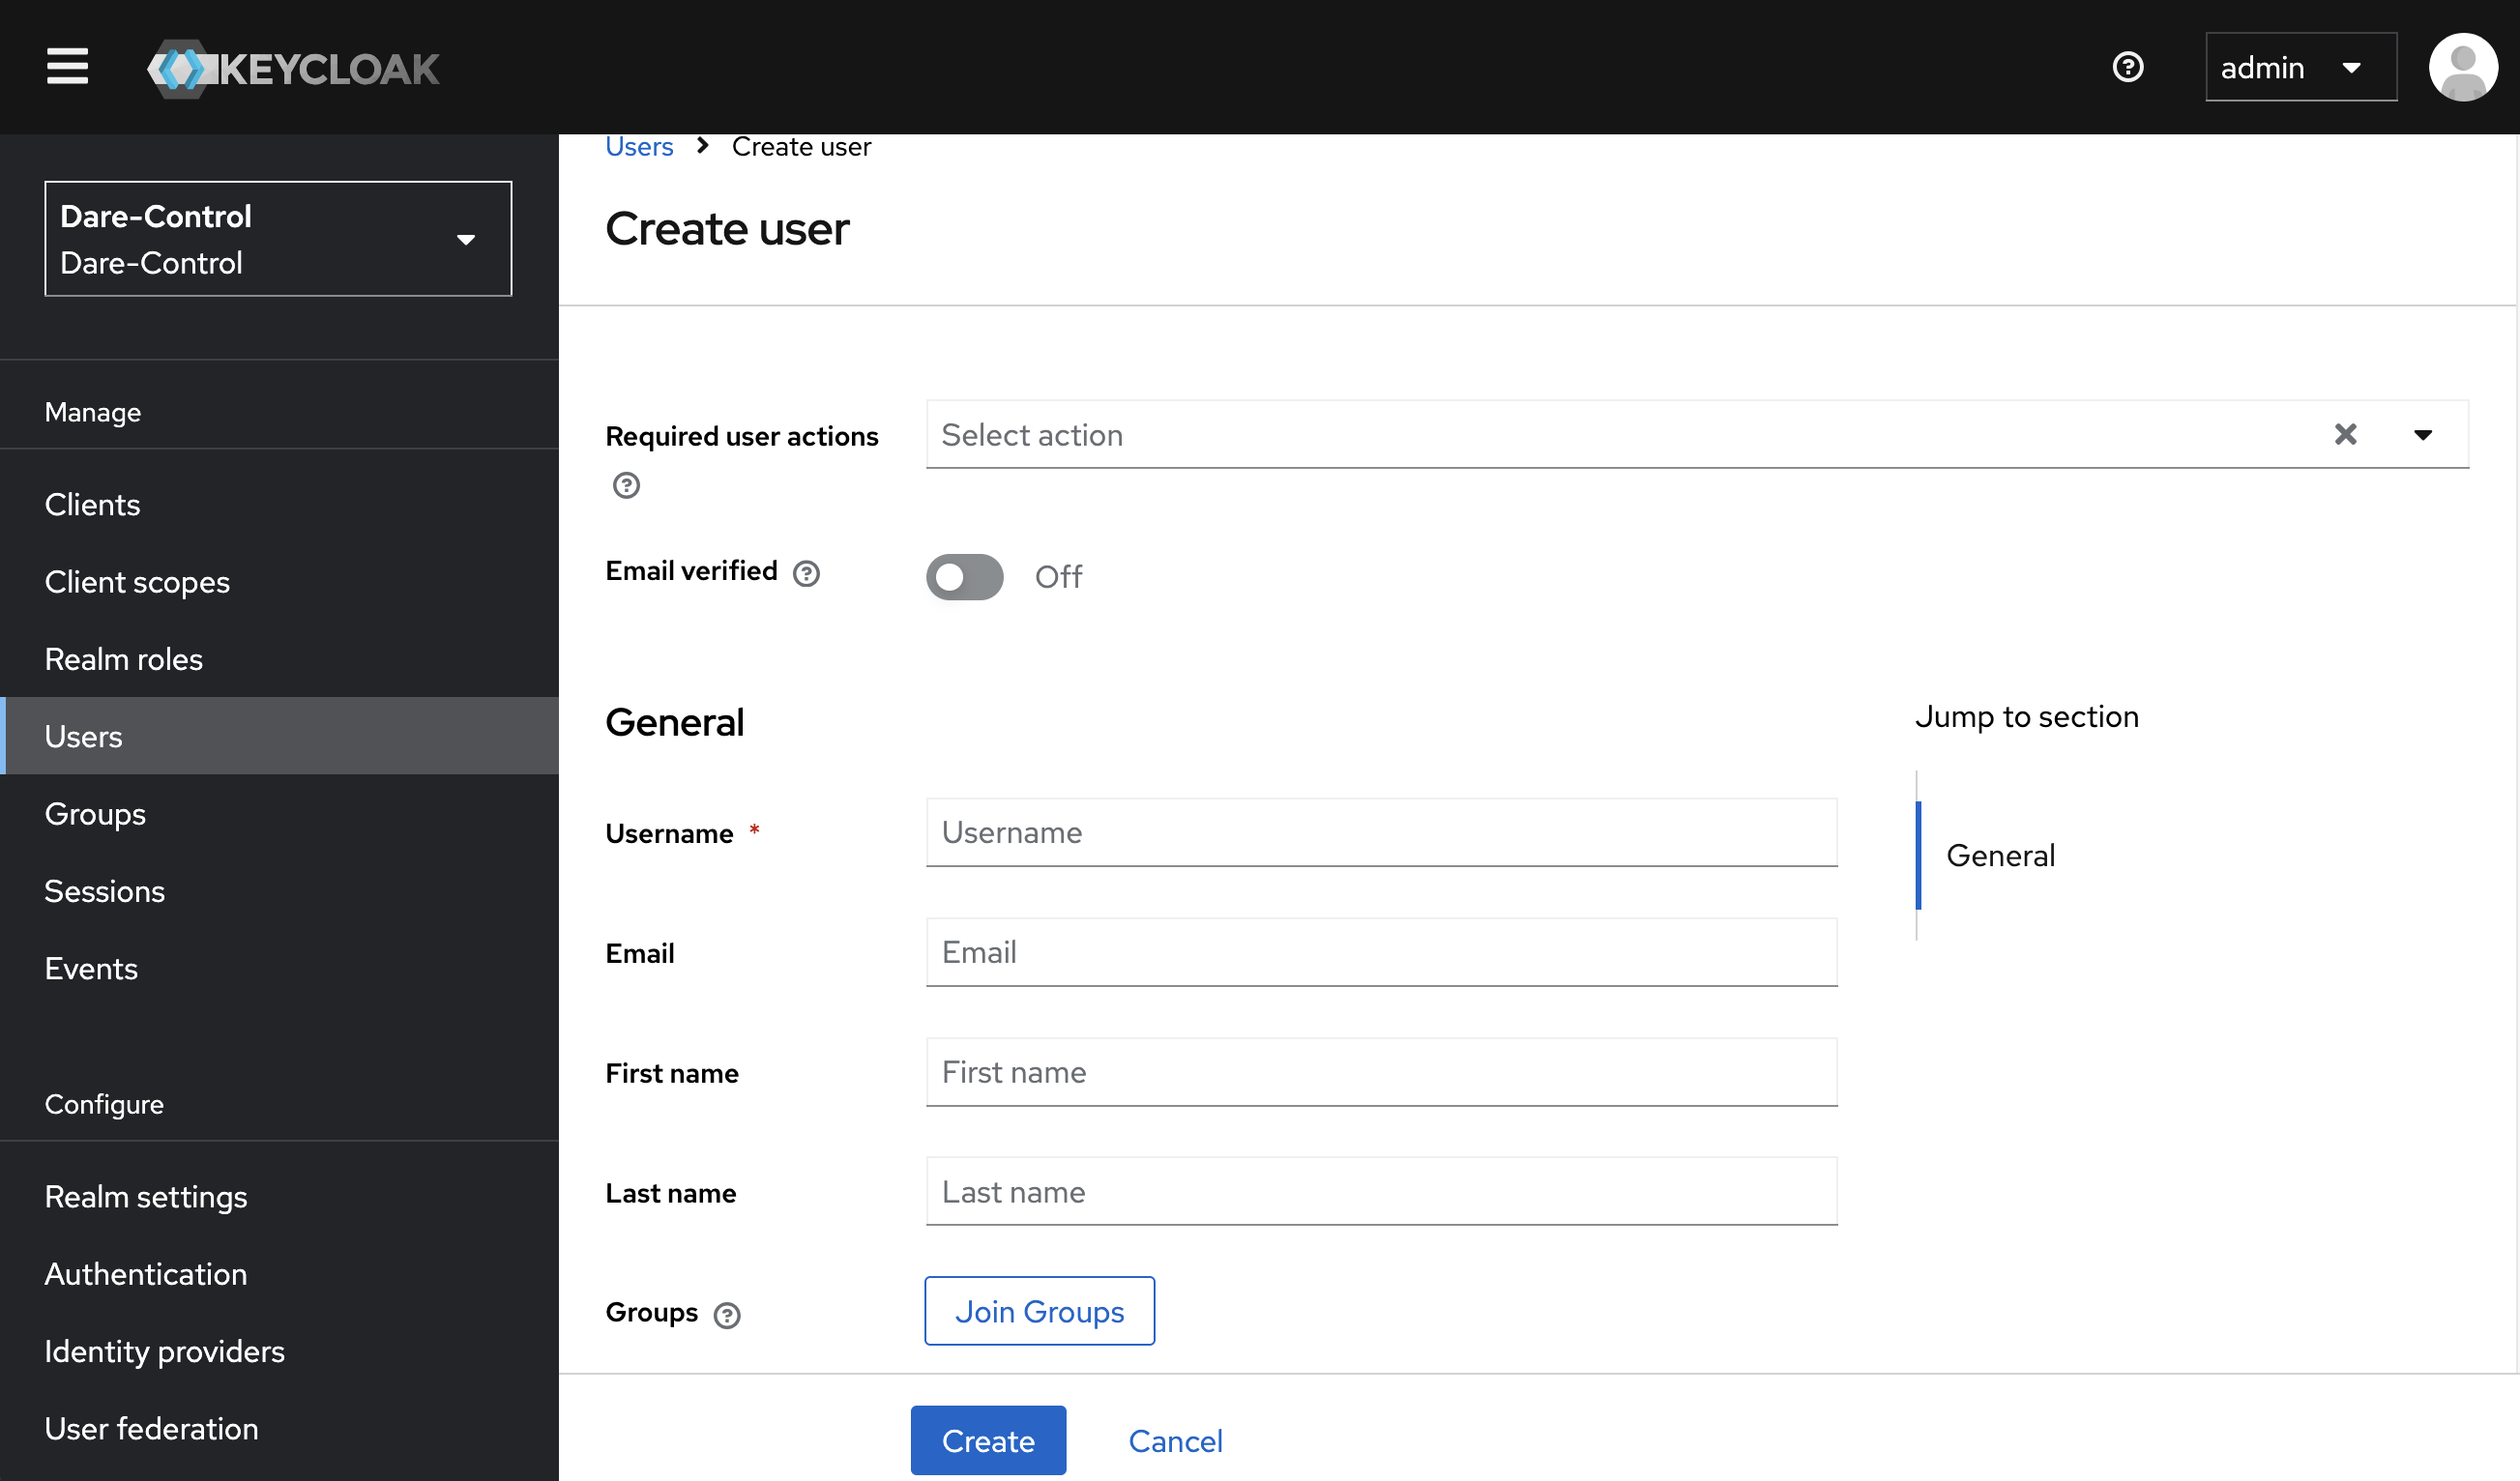
- Select the required user actions on first log-in (this is optional, and recommended to be left blank for the demonstration)
- Select if email verification is needed (this is optional, and recommended to be left blank for the demonstration)
- Set Username (mandatory)
- Set Email, First and Last names (optional)
- Open the ‘Select groups to join’ dialog by clicking the ‘Join Groups’ button. Select the required groups (as noted in the prerequisites).
- Finally, click the blue ‘Create’ button at the bottom of the screen.
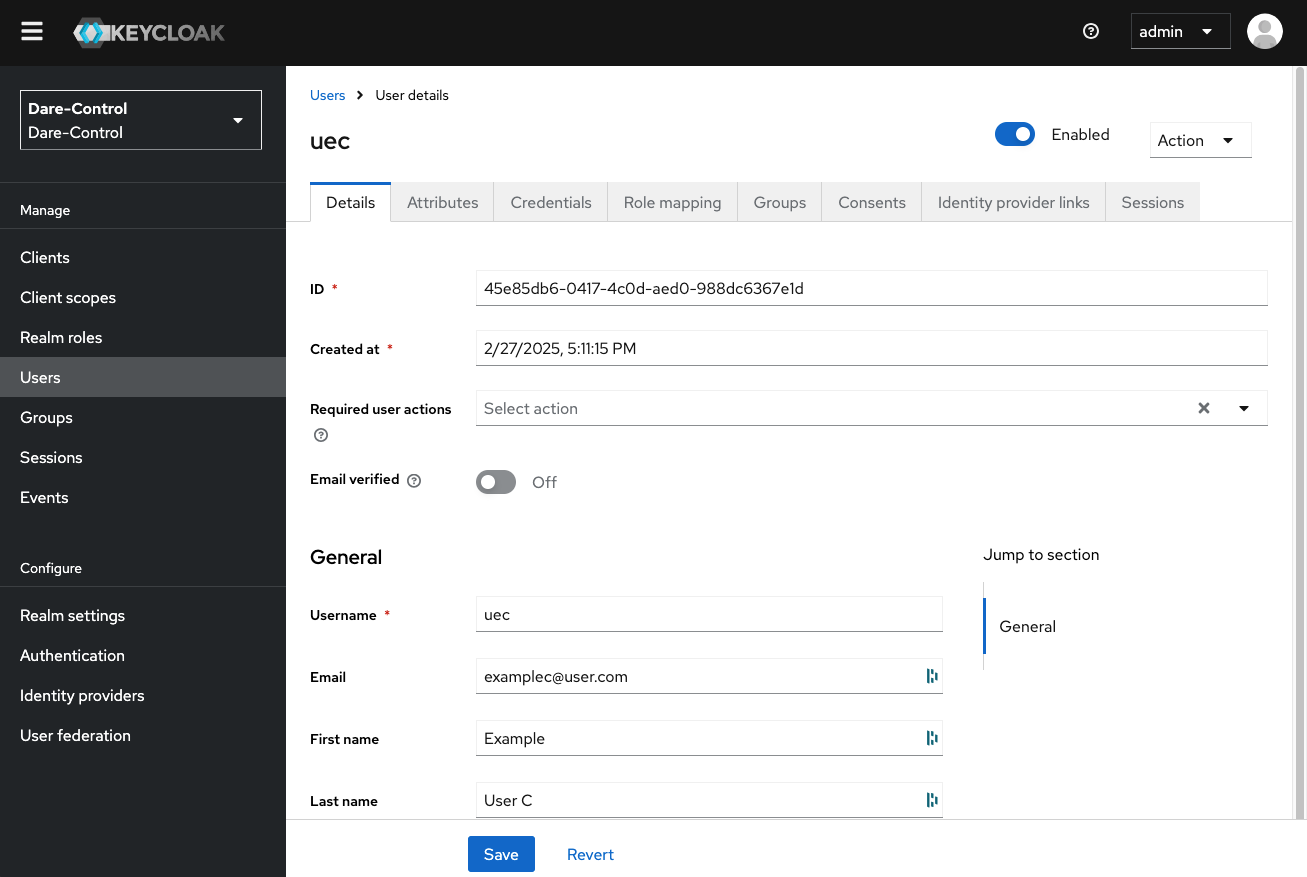
Apply any Required Extra Configurations
Once the user account has been created then the ‘User details’ page for the new user will be displayed. At this point you can set any required extra configurations for the new account.
💡
For the demonstration ‘AllInOne’ stack use these configurations:
- Set Password: Select ‘Credentials’ tab, and click the blue ‘Set Password’ button. Enter a password, and deselect the ‘Temporary’ option.
- Remove Required User Actions: Select ‘Details’ tab, and remove any items from the ‘Required user actions’ list (such as ‘Configure OTP’).