- Target Audiences
- Federation Operator
- TRE Operator
- Contributor
Adding a Keycloak User
This guide describes how to add a new user to the Keycloak instance, especially for the Submission Layer and TRE Layer in 5S-TES.
Prerequisites
- Access to Keycloak Admin Console as Administrator user
- Information about the user to be added:
- Username
- First Name
- Last Name
- Role
Steps
Login to Keycloak and navigate to the intended Realm
- Login as an admin user (of the master realm) to Keycloak server of the service you are adding the user to (e.g., Submission Layer, TRE Layer, etc.).
- Use
Manage realmsto navigate to the realm you are adding the user to, i.e.,Dare-Controlfor Submission Layer,Dare-TREfor TRE Layer andData-Egressfor Egress Layer.
Navigate to the Users page.
Navigate to the Users page.
Open Create User dialog.
Click on the blue ‘Add user’ button to open the ‘Create user’ dialog.
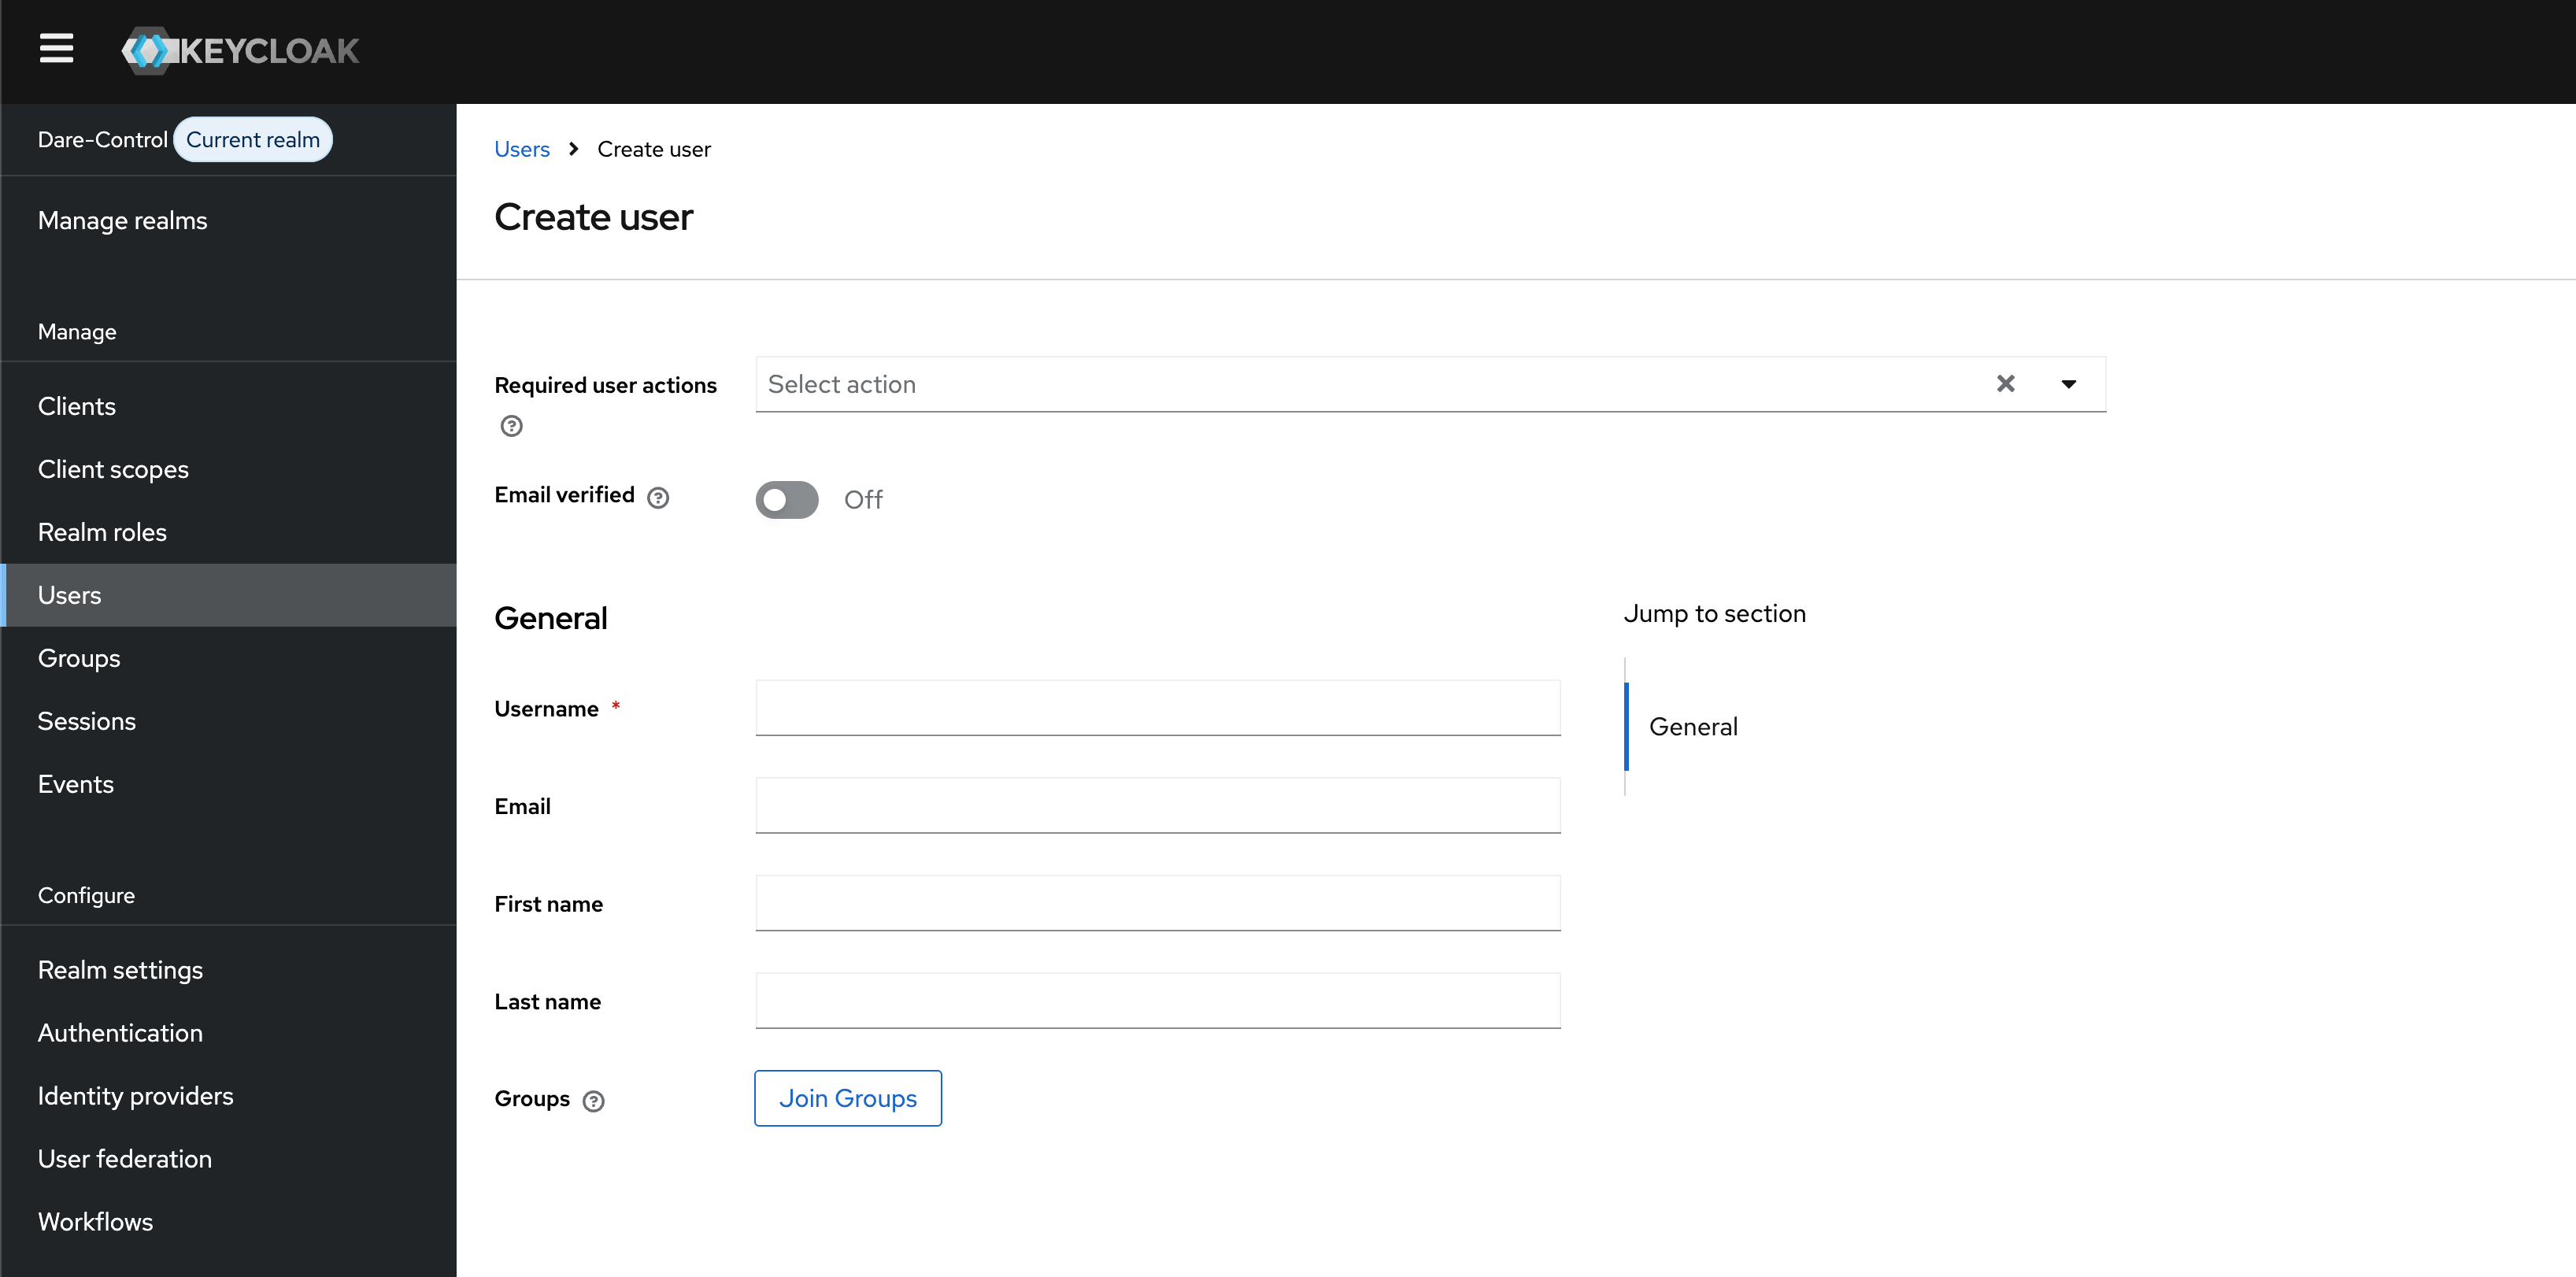
Enter User Details, and Assign to Required Groups.
- Select the required user actions on first log-in (this is optional, and recommended to be left blank)
- Select if email is verified
- Set Username (mandatory)
- Set Email, First and Last names (optional, recommended to be filled in)
- Open the ‘Select groups to join’ dialog by clicking the ‘Join Groups’ button. Select the required groups (as noted in the prerequisites).
- Finally, click the blue ‘Create’ button at the bottom of the screen.
- In a Submission Layer, to be able to add/remove people to/from a project,
users need to have
dare-control-adminrole (Role Mapping tab) and joineddare-control-admingroup (Groups tab) on KeyCloak. - To access the TRE Layer’s storage, users need to have
dare-tre-adminrole (Role Mapping tab) and joineddare-tre-admingroup (Groups tab) on KeyCloak.
Apply any Required Extra Configurations
Once the user account has been created then the ‘User details’ page for the new user will be displayed. At this point you can set any required extra configurations (e.g., password, role, group) for the new account.
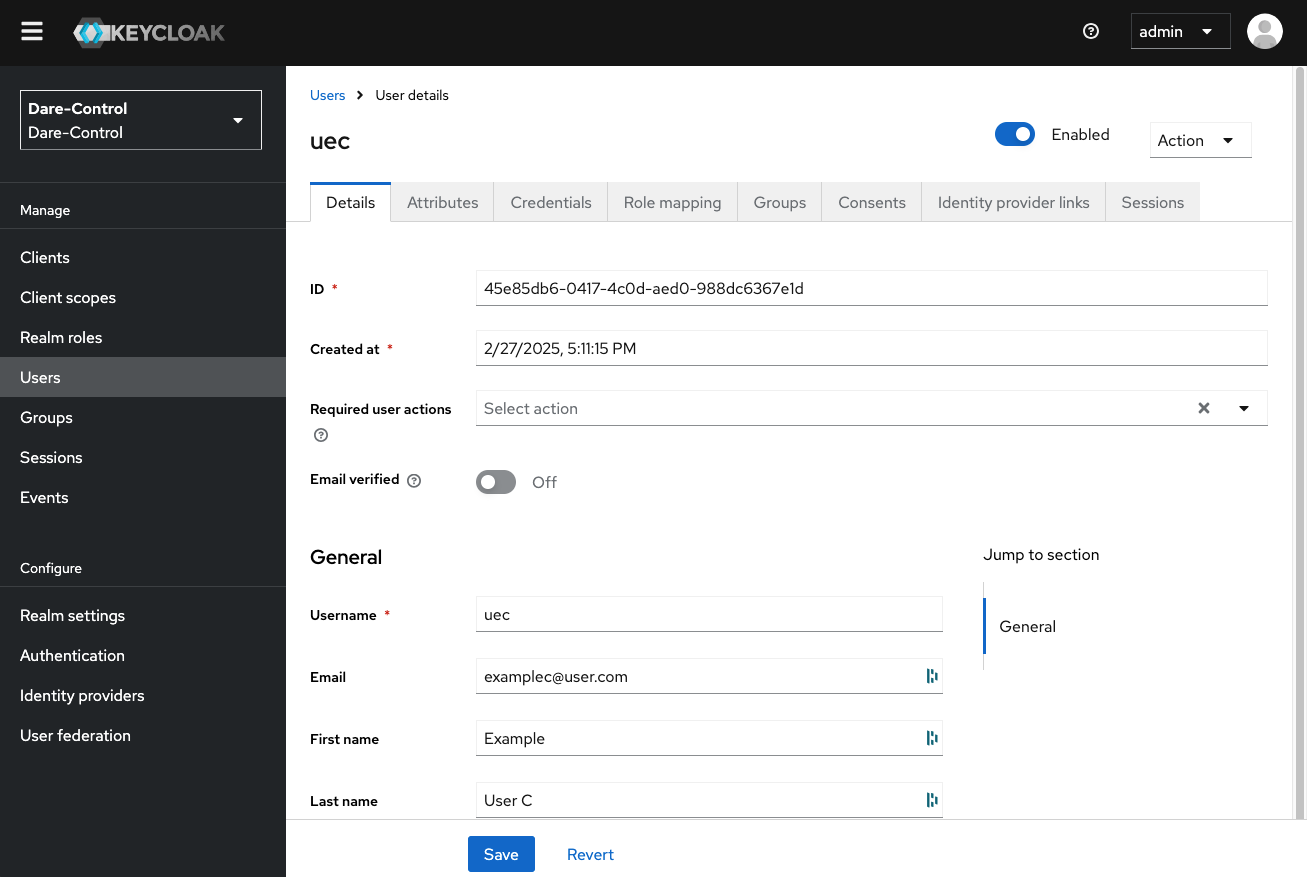
- You can use the
Credentialstab to set a temporary or permanent password for the user. - You can use the
Detailstab to set any required extra configurations for the new account. - You can use the
Role Mappingtab to set the role for the user. For example, Submission Layer admin needs to havedare-control-adminrole. - You can use the
Groupstab to set the groups for the user. For example, Submission Layer admin needs to be joineddare-control-admingroup.
Last updated on